The serpentine belt in the 2009 Toyota Camry is a critical component that plays a vital role in powering various engine accessories. Its intricate design ensures the efficient transfer of power from the engine to essential components like the alternator, power steering pump, water pump, and air conditioning compressor. Understanding the 2009 Toyota Camry serpentine belt diagram is crucial for proper maintenance and troubleshooting, ensuring a smooth and reliable driving experience.
What Is A Serpentine Belt?
In nearly all modern cars, you’ll find a serpentine belt positioned at the front of the car engine. This belt wraps around or winds through various engine parts equipped with pulleys. Its primary function is to enable these pulleys to operate efficiently, directing them in specific directions and at desired speeds.
Here’s how it operates: As the engine starts running, the crankshaft pulley begins to rotate, which in turn, sets the serpentine belt in motion. As a result, the power steering, tensioner, generator, water pump, and AC pulleys also start rotating, powering their respective components.
Serpentine belts are commonly made from neoprene or EPDM (ethylene propylene diene monomer) rubber. EPDM rubber possesses properties similar to other natural or synthetic rubbers but boasts a longer lifespan. Nevertheless, over time, both materials will wear out, leading to issues such as fractures and tearing. To prevent any potential failures, it’s crucial to replace the serpentine belt as soon as any signs of damage or strain become evident. Regular inspections and timely replacements will ensure the smooth functioning of the engine’s pulley-driven components.
What Is The 2009 Toyota Camry Serpentine Belt Diagram?
A serpentine belt diagram plays a crucial role as a visual guide for various purposes related to your vehicle’s belt system. Whether you’re assembling, maintaining, or replacing the serpentine belt, this diagram provides valuable assistance. Moreover, it proves beneficial in identifying the specific pulley or component to which a squeaking or slipping belt may be connected, allowing for timely troubleshooting and maintenance.
For specific vehicle models like the 2009 Toyota Camry, serpentine belt routing is unique to each car. To ensure accurate information, always consult your vehicle’s owner’s handbook or service manual for the appropriate routing instructions.
In the case of the 2009 Toyota Camry, the serpentine belt arrangement involves connecting various components, including the power steering, tensioner, generator, water pump, crankshaft pulley, and air conditioning. This configuration is similar to the 2008 Toyota Camry serpentine belt layout. By referring to the diagram below, you can gain a clearer understanding of how these components interconnect through the serpentine belt system.
The serpentine belt diagram proves to be an invaluable tool in maintaining your vehicle’s optimal performance and ensuring smooth operation of the belt-driven components. With accurate guidance, you can carry out necessary maintenance tasks efficiently and proactively address any belt-related issues.
How Long Does A Serpentine Belt Last?
The lifespan of a serpentine belt typically ranges from 60,000 to 100,000 miles, or around five to seven years. However, this estimate can be affected by various factors, making the actual durability variable. Factors like the vehicle’s specific model, manufacturing year, belt quality, and the types of road surfaces it encounters can all influence the belt’s longevity.
External conditions can also play a role in determining the belt’s lifespan. If the belt is exposed to extreme temperatures, harsh chemicals, or other adverse elements, it may wear out faster and require replacement earlier than expected.
Regular inspections of the serpentine belt are crucial and are often performed during routine auto maintenance check-ups. By regularly checking the belt’s condition, you can identify signs of wear or corrosion early on. If any issues are detected, it’s essential to replace the belt promptly to avoid potential breakdowns or damage to other engine components.
Different serpentine belts have different tensioning systems. Some belts require manual adjustment to maintain the proper tension, while others feature self-tensioning systems that may require periodic maintenance due to natural wear and tear.
It’s essential to prioritize timely replacement and maintenance of the serpentine belt. If the belt cracks or breaks while the vehicle is in operation, it can lead to significant engine problems and result in the car not functioning properly. Regular maintenance and proactive belt replacement are essential to ensure the smooth and reliable performance of the vehicle’s engine and related systems.
Where Can I Find The Serpentine Belt Diagram for My Car?
Much like the Toyota Camry’s wheel lock key location, a decal with the serpentine belt schematic is often located in the engine compartment. This helpful visual guide assists in understanding the proper routing of the belt. However, in the event your vehicle lacks this sticker, don’t worry; you can easily find the schematic in the service handbook or on relevant websites dedicated to automotive information.
Another practical approach is to capture a picture of the old belt before removing it. This simple step allows you to refer to the car’s handbook or service manual when installing the new belt. By following the correct circulation pattern, you can avoid any potential mistakes and ensure a smooth and successful belt replacement. The visual reference proves valuable in maintaining the optimal performance of your vehicle’s belt system.
How To Replace Toyota Camry Serpentine Belt?
Step 1: Lift The Car Up
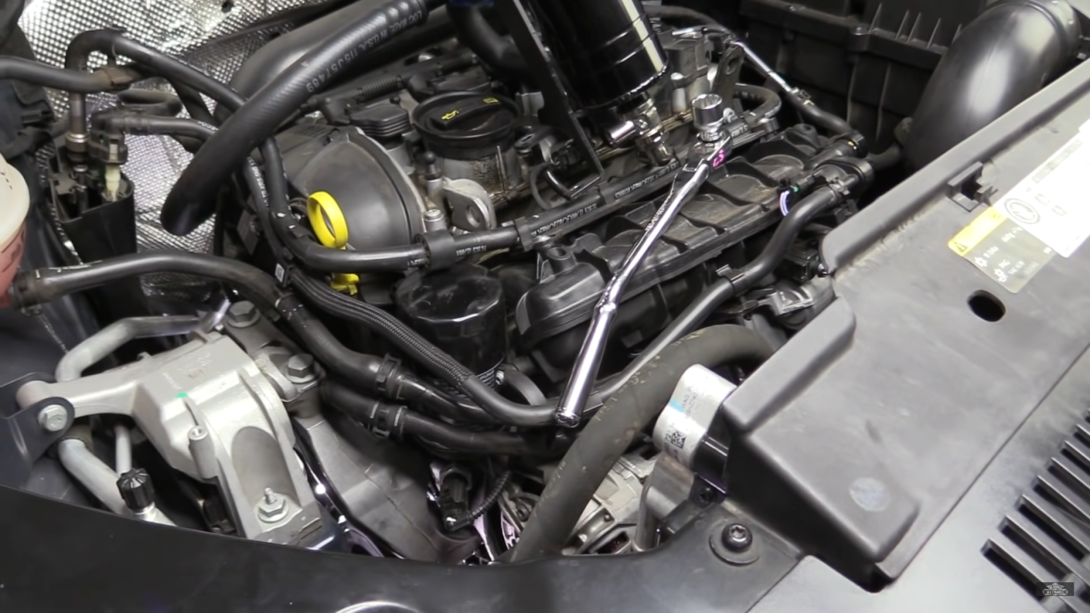
The initial step in replacing the serpentine belt in the 2009 Toyota Camry involves driving the car to a suitable location, such as a garage or secure parking space. Once parked, utilize the jack tool to safely lift the car, ensuring proper stability. Secure the jack brackets in front of the frame of the front wheel to provide a stable base for the belt replacement process.
After lifting the car, proceed to remove the two front tires and the bolts holding the wheel fenders in place. This will create easier access to the engine area where the serpentine belt is located. Carefully pick up the panel and set it aside, allowing for a clearer view of the belt tensioner components.
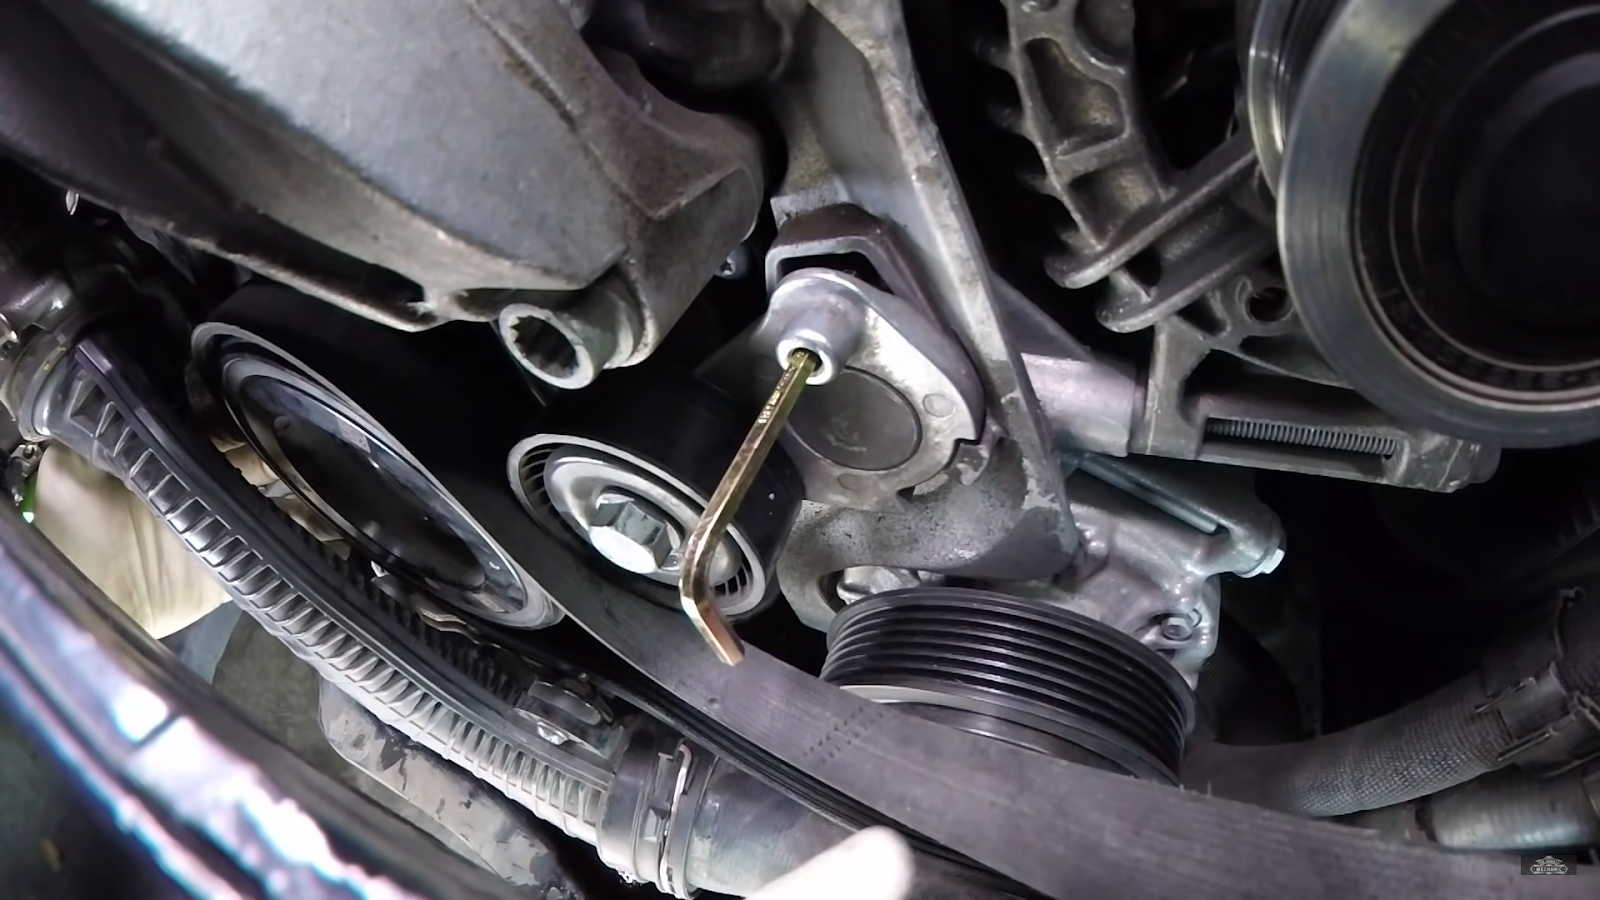
The belt tensioner assembly consists of a pulley, swing bar, and hydraulic cylinder, all responsible for applying pressure to the serpentine belt. Pay close attention to the head of the bolts attached to the removal tool’s socket, as they must be securely fixed to ensure successful removal of the belt.
It is essential to be cautious of the swing bar, as it will rotate as the engine runs. Take note that the bolt head made of aluminum alloy can be susceptible to stripping, so handle it with care during the replacement process.
Step 2: Remove Front Tire And Fender Splash Panel
First, start by detaching the two front tires and removing the bolts securing the wheel fenders. Once that’s done, carefully lift the panel and set it aside. Underneath, you’ll find a pulley, a swing bar, and a hydraulic cylinder. These components make up the 2009 Toyota Camry’s belt tensioner, responsible for applying pressure to the belt. Take note that the head of the bolts connected to the removal tool’s socket is fixed in place.
Keep in mind that the swing bar will rotate while the engine is running. Also, be cautious as the bolt head of this aluminum alloy component is prone to stripping.
Step 3: Remove The Serpentine Belt
To release the belt, you have two options:
- use a long wrench to turn the belt tensioner;
- utilize a special service tool designed by Toyota.
If you opt for the service tool, attach the socket to the screw and then spin the tool counterclockwise. Be cautious during this process, especially if the tensioner incorporates a tiny hydraulic cylinder, as it requires gentle handling.
Once the nuts have stopped spinning, secure the wrench in its position. Now, proceed to loosen the serpentine belt from the pulley closest to you. Use a screwdriver to remove the belt from the motor area, and then disengage it from the other pulleys.
Now, locate the instrument panel within the tire bore and identify the bottom of the nut that secures the hydraulic cylinder tensioner. While doing so, take care not to lift the piston off its socket, but instead, loosen the nut carefully.
Step 4: Hold The Engine
Safety is paramount when replacing the serpentine belt on a 2009 Toyota Camry 2.4. To ensure a secure working environment, follow these steps: Place a sturdy wooden plank on your lift jack, positioning it beneath the oil pan of the engine. Carefully raise the jack until the plank provides support to the engine, but refrain from lifting it further. This setup will help keep the engine stable and secure during the belt replacement process, minimizing any potential risks.
Step 5: Remove The Bolts
Take a small socket wrench and use it to loosen the bolts that secure the motor mount. Once the bolts are loosened, carefully remove them. Set the engine mount aside, making sure that the engine remains securely held in place.
Step 6: Jack Up The Engine
To remove the tensioner shafts, it’s important to create enough space. You can achieve this by using a trolley jack to raise the car a few inches (around 1 or 2 inches is ideal). However, exercise caution as excessive pressure on the engine’s end may harm the oil pan and potentially cause further damage.
Once the car is lifted, proceed to loosen and remove the other bolt using a long wrench. Once it’s loose, switch to a shorter wrench for easier handling. Create enough space between the bolt and the edge of the engine bay so that you can slide the wrench out until it contacts the surface of the engine bay.
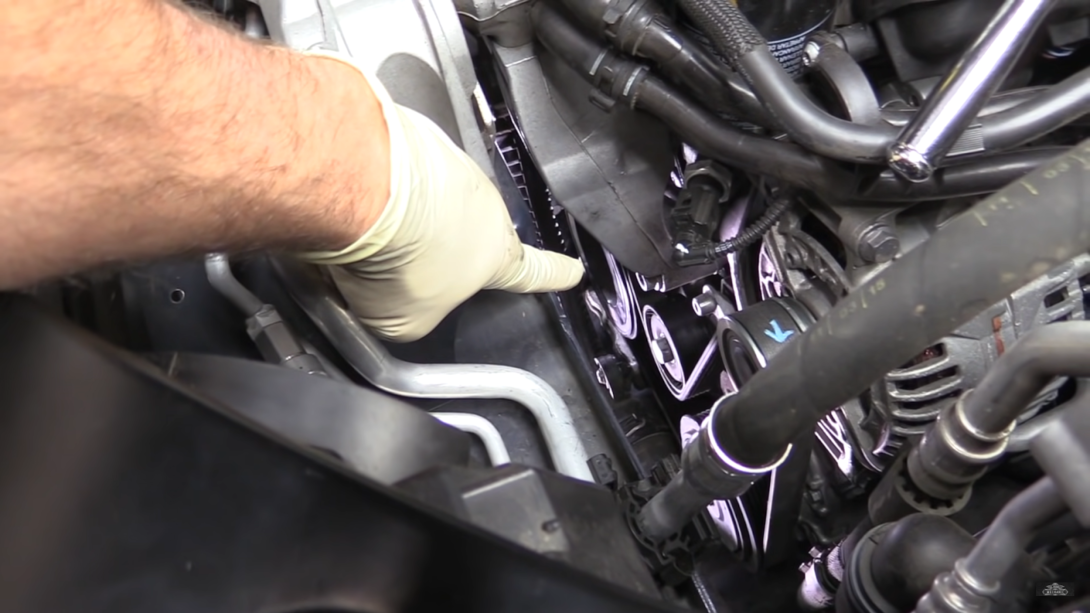
Disconnect the strut from the end of the tensioner by slipping it off the connection screw from the instrument panel. Now, rotate the tensioner so that the exposed bolt tip faces upward, and separate the end of the strut. Use your hand to remove this bolt until the studs are fully separated from the engine compartment.
With the bolt still in the mount, pull the tensioner upward towards the car. Be patient and ensure that you carefully lift the tensioner to hold the struts at the end. Now, rotate the strut upward and around the bolt and connecting brackets. Continue raising the tensioner while turning and twisting it to finally remove it from the engine bay.
Step 7: Replace The Belt
Always avoid using an old belt again. To properly install the new belt, refer to a schematic that shows the correct path for the spiral drive belt in the hood.
When routing the belt over the groove spindles, make sure the water pump pulley is the last one. This arrangement allows the belt to slide onto the pulley more smoothly. Once the correct routing is done, replace the belt with a brand-new one for optimal performance and longevity.
FAQ
Yes, replacing a serpentine belt is usually a straightforward task. If you have the necessary equipment and knowledge, you can often handle the replacement on your own. However, it is essential to record the serpentine belt’s routing before starting to ensure proper restoration.
No, serpentine belts are non-directional. The rotational axis of a new serpentine belt typically does not matter as most of them are symmetrical. However, it is crucial to route the new belt properly over the pulleys and ensure that the grooved end of the belt makes contact with the pulley grooves.
Using a second-hand serpentine belt may have an impact depending on the manufacturer of the drive belts. Some manufacturers recommend replacing the old belt in the same direction and suggest marking an indicator to ensure the drive belt’s ribs match the pulley grooves.
No, serpentine belts are typically non-directional, but installing them incorrectly can lead to overheating and potential engine damage. It is crucial to ensure that the grooved sections of the belt reach the pulley grooves, and the smooth sections make contact with the pulleys’ surfaces. Using a belt routing diagram or referencing a picture of the old belt during installation can help ensure the belt is correctly routed.
Conclusion
Understanding the 2009 Toyota Camry serpentine belt diagram is essential for every Camry owner. By recognizing the significance of this vital engine component and learning how to diagnose and address potential problems, drivers can ensure their Camry’s engine runs smoothly and efficiently for years to come. Regular maintenance and care for the serpentine belt will contribute to a reliable and enjoyable driving experience in the 2009 Toyota Camry.